

Scenario:
In this scenario we will create a WNMS Cloud Login and connect a Deliberant Wireless Access Point to the WNMS Cloud Management Service.
Step 1:
You can signup for a free account for the WNMS System or alternatively download the management software for Windows and Linux. I would recommend the free online account for the purpose of this tutorial. More advanced users can download and install the Application on their network or on the Amazon Web Services Cloud however that part will not be covered in this tutorial.
Easy Method: http://wnmscloud.com
Custom or Advanced Option: http://www.deliberant.com/wnms
Step 2:
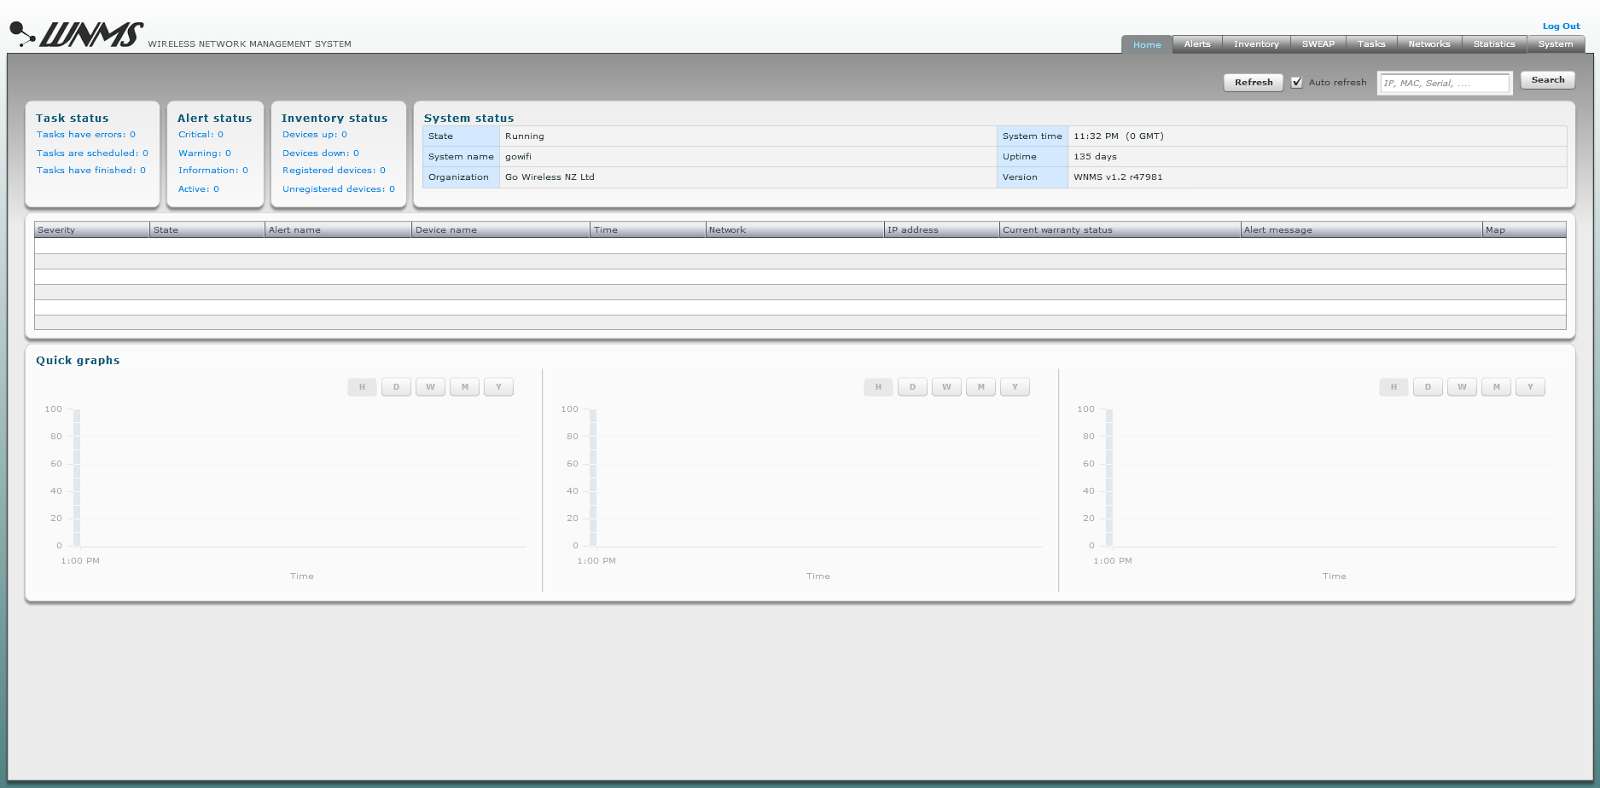
Once you have created an account (or installed configured the software), Navigate to the WNMS login page in your web browser. Make sure you change the default password.
http://gowifi.wnmscloud.com
Username: admin
Password: admin01
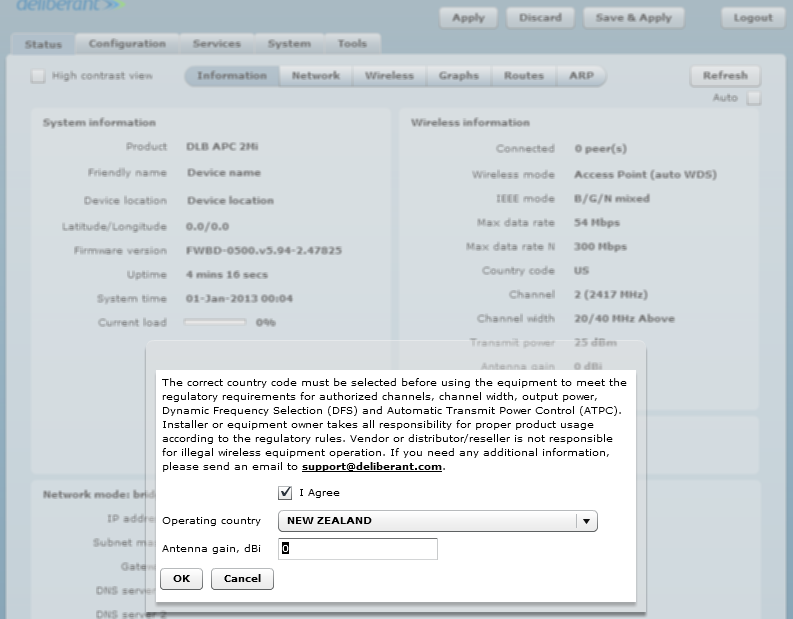
Configure a static IP Address of 192.168.2.10 on your computer and connect directly to the Deliberant Wireless Access Point via Ethernet cable. You should now be able to login to the Access Point on the default IP Address 192.168.2.66. Select your Country Code and leave the Antenna Gain at 0dBi for now.
http://192.168.2.66/
Username: admin
Password: admin01
Change the IP Address of the Access Point onto your internal network which has internet access (for accessing the WNMS Cloud Management System). You may need to change your computer IP Address back to Assign Automatically after this.
Navigate to Configuration > Network.
IP Address: 192.168.1.30
Subnet Mask: 255.255.255.0
Default Gateway: 192.168.1.3
DNS Server 1: 192.168.1.3
Save and Apply Settings.

Navigate to Services > WNMS and enable the WNMS Agent. Enter the url of your WNMS Agent configured earlier which in my case is https://gowifi.wnmscloud.com/.
Select Test to test the connection to the WNMS Server. The Server should respond with "WNMS server responses successfully". If you receive a connection timeout, please ensure your device has internet connectivity.

In the WNMS web management interface navigate to the Inventory tab and locate your device. You should be able to select the "Device name" to bring up the details for your device.

The new Access Point needs to be added to a network group. I have chosen to place it into the default HotSpot Network group. You can create your own or use another existing network group. Click Register to register your device with the WNMS System. If it is not listed try running a scan repeatedly as it can take a few minutes to show up.
Click Save.

Your device is now registered and is ready to manage using the WNMS Management System. Our next blog will explain how to configure and manage your device(s) remotely from within WNMS.
No comments:
Post a Comment